
Thursday, October 28, 2010
Fat Four Eyed And Useless-By Jahna
Ben Hambleton hates sports he is bad at it infact he is fat four eyed and useless. That's what Maxwell and his gorilla friends say.Ben decides to join a writing club.Will this be the one thing he his good at? And will he like it? 
Wednesday, October 27, 2010
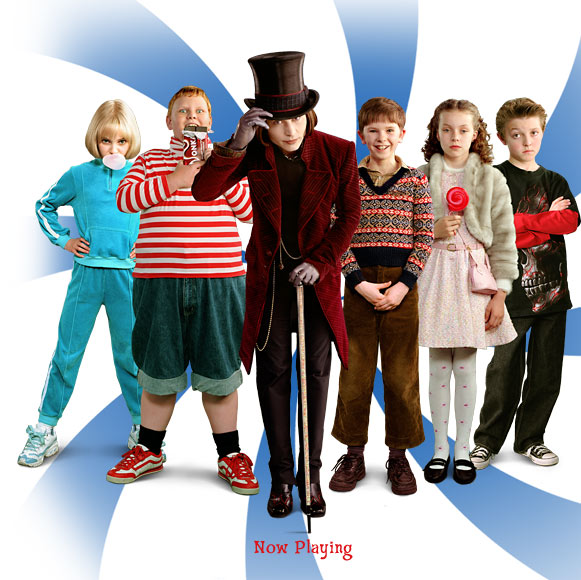
Charlie and the Chocolate Factory - A synopsis by Sanne
Finally the chocolate factory has re-opened after many years.
What is it like in their, who works in their strange little people have been seen walking about through the windows.
5 golden tickets have been sent out to the whole world. Who will be the lucky ticket holders?
What will await these ticket holders as they enter Mr.Wonka's magical factory?
Mr.Willy Wonka shows them around but some of the children start disappearing in the factory in strange, mysterious ways.
Find out what happens to all of the children and who will get the greatest prize of all?
The Series Of Unfortunate Events-The Vile Village By Jahna
 Violet Klaus and Sunny Baudelaire are three orphans that lead a bad life.Mr Poe gives them a flyer that says a village to raise a child Mr Poe says they will have to pick a village. And they pick V.F.D, will this be the way to defeat Count Olaf? will they find out the real secret of V.F.D? Or will it be a wast of time,well i can tell you this story is filled with unpleasant matters as migrating crows,an angry mob,a newspaper headline,the arrest of innocent people,the deluxe cell and some very strange hats.THE END
Printmaking Instructions by Michael
Instructions: Hand at the back of the blade. 1: Get a piece of wood for cutting.
2: Come up with a moari patten.
3: Draw the patten on to the borad.
4: Then go and get the chisel.
5: Then cut it out with the chisel.
6: Then panit over it with printing ink.
7: Put a peace of paper over it.
8: Press hard on the piece of paper.
9: Then take the piece of paper off it very slowly tring not to rip it.
10:When it is dry it will look cool.
The purpose of this activity is to have fun and create a wonderful print.
Hide and Go Seek Tag - How to Play by Gemma
1. You need at least 5 people.
2. Two of you need to be in and count to 50 (slowly)
3. When the taggers are counting hide enywhere you like except the class room and inside.
4.When the taggers have counted they can now look for the hiders.
5.When they have found the hiders the taggers need to chase them and try and tag them.
6. If they do not tag them they have to keep chasing them, but if they do tag them then they are in next time and you need to find one more person then find the other hiders and tell them the two new taggers and the new taggers will count to 50 < slowly > and the rest will hide again.
You need to count slowly
You can play all day
The Aim of the Game: The aim of the game is for the taggers to find the hiders and tag them as quickly as possible.
Rules. The rules are the taggers can not peek and they have to count to 50.
The hiders have to move to different places every 2 minutes.
Happy playing.
Go Home Stay Home - How to Play by Arlia
Step 1. The aim of the game is to try hide somewhere and make sure the taggers don't see you and get home before they tag you.
Step 2. You need to get at least 5 people to play Go Home Stay home.
Step 3. Decide who's going to in( 1 or 2 people)
Step 4. Have a place thats easy or hard to get to.(Thats home)
Step 5. The tagger or taggers have to count to 60 slowly.
Step 6. Try to get back to home and when you get to home say Go Home stay home 123 that means your safe.
Step 7. The last person who hasn't got home is automatically in
You can play this anywhere but best at school or at a park.
Happy playing -enjoy
Liam's cricket instructions
Step 1: You need 2 wickets at each end of the pitch.
Step 2: Then you need to get 2 teams of 11 players and flip a bat or coin to see who bats or bowls.
Step 3: After that you get your team in there positions and when the umpire signals for the bowler to bowl the games on.
The rules are:
You cant bowl past the cress.
You have to bowl 6 balls.
You have to play cricket at a park or stadium.
There has to be 2 batsman, 1 wicket keeper and 1 bowler.
The aim is: Whoever is batting has to try and get the most runs and if your bowling and fielding you have to try and get the most outs.
How To Play Spolight - By Amara
Spotlight
The aim of the game is to not get found by the finder and be the last one to be found.
Rules;
1. You will have 30 seconds to find a good hiding place, once you have found there hide there and wait till the tagger comes and finds you.
2. You can move places when the tagger isn't looking or near you. If they see you going past you have to follow them.
3. When you are following them you cannot tell them where the other players are hiding.
There can be up to 10 players, and one is the tagger.
how to play spotlight by letisha
The aim of the game of the game is:
1. Not to be in .
2. To get people out
What you would need/do:
1. All agree for were a hiding spot.
2. A place to play ( make sure that you have your parents supper vision )
3. Wait until it is dark so you can play.
4.Pick someone to be in
That's the game!!!
1. Not to be in .
2. To get people out
What you would need/do:
1. All agree for were a hiding spot.
2. A place to play ( make sure that you have your parents supper vision )
3. Wait until it is dark so you can play.
4.Pick someone to be in
That's the game!!!
Thursday, October 21, 2010
lost
Valdez has only recently arrived on Eco to join his famous scientist sister. When the shuttle crashers in a remote part of the planet.Valdez finds it hard to survive in the unhealthy environment as well as as he has the
suspicion that his sister is hiding a big secret.
By Jahna
suspicion that his sister is hiding a big secret.
By Jahna
Game Instructions
SPOT LIGHT
Need 10 or more people
Aim of game:
By Marshall
Need 10 or more people
Aim of game:
Try find the people hiding (Tagers Aim)
Try be the last one in hiding. Try find a good hiding spot where you won't get found (Hiding People's Goal)
Rules:
You can not tell any one where you are hiding
No giving your self away
Play when its dark
Only tagger/finder has a torchPlay when its dark
Wednesday, October 20, 2010
How to play rugby by Alex
Step 1:You need two teams with fifteen players on each team.
Step 2:You need a rugby ball and some goal posts at each end.
Step 3:Flick a coin to see which team does which.The options are choose if you receive the ball or weather you choose which way you go.
Step 4:After that the team kicks off and the game is on.
The Rules Are:
You cant pass the ball forward or knock it on.
To play the ball you have to be on your feet.
The tackler must roll away once the tackle is made.
No off-side play.
When you score a try you have to put the ball down over the try line.
If you decide to kick the ball your whole team must be behind you.
The Aim Is:
To get the ball and score more points than the other team after 80 minutes.
5 for a try, 2 for a conversion and 3 for a penalty.
Busted - A Great Game for Everyone
The aim of the game is to get away from the tagger without taking too many steps on the bark.
It is like tag, except you are not allowed to stand on bark. You can choose a limit of steps so that you can still get to places that you can not get to without stepping on the bark.
You will need: more than 3 people and a playground.
While the tagger is looking somewhere else then you can quickly take more steps so that you can get to a place further away from the tagger.
If they see you on the bark than they can say BUSTED! Then you are automatically the tagger. You can also beciome the tagger if you get touched by the tagger who is in and so the game continues.
How to make clay tiles by Jessica
You will need a mat, some clay, some utensils, and water /an art shirt
1*First you will need to put your art shirt on as clay is very messy.
2*Now you need to get some clay but make sure you keep your hands wet other wise it will dry out.
3*Now you can practice making things out of clay.
4*Once you have finished making your practice clay you can make your tile.
5*To make your tile you need to mold your tile into a square shape.
6*Put your ideas on the tile using the utensils. You can draw anything you like.
7*Leave it in the sun to dry and display as you like.
Tuesday, October 19, 2010
Liam's Art Instructions
Computer art workshop
The first thing we learnt when we got there was learning different skill colours and textures.
Then Paul told us what group we were in and after that he told us what our group was doing.
Our group was taking 30 different pictures.
First we had to take 10 natural pictures then 10 man made pictures and last but not least 10 pictures involving people.
A while after that we had to make a five photo story of any thing but it had to make sense once we did that we had to upload the five photo story and the 30 pictures on to the Internet.the next break our group was going on Art Rage and Paint to use different colors and textures to make a painting or Murial soon after that we got to see our Murial's paintings five photo story's and our 30 different pictures.
letishas instructions how to make clay tiles
Step 1:
Sit down at a desk so the teacher can tell you what to do and give you a place mat.
Step 2:
Once you teacher has told you what to do you would be able to get all your tool like
: knife
: spoon
: fork
etc
Step 3:
Start building your practice house and get 4 judges , so they can pick a winner.
Step 4:
When you have a break put a hole in the middle of your clay and fill it up with water then it will keep your clay Moise.
Step 5:
When you get back mix in the water your teacher will tell you what to do next like for your real theme ( our theme was proud to be a kiwi ) so that's what yours will be
Step 6 :
Once you have finished doing your proud to be a kiwi then you would have to put it up on the bench
Step 7 :
Pack up and wait until it has dried then you could take it home!
Friday, October 15, 2010
Computer Art by Alex
Step 1:Paul orginised us into to groups group one and group two.
Step two:Group one [my group] went out two take thirty photos ten of man made things ten of natural things and ten of things involved with humans.
Step 3:Group one came in to download the photos.
Step 4:Then group one came back outside to take a five photo story.
Step 5:Then group one came in to download the five photos in order of a five photo storie.
Step 6:Group two went out to take thirty photos while group one went on paint.
Step 7:Then group two came in to download thirty photos.
Step 8:Then they went to take 5 photo stories.
Step 9:Group one went on artrage.
Step 10:At the end of the day both groups enjoyed it and we went home.
Book Review
Harry Potter And The Phloshpers Stone J.k Roling
 The story starts with a boy called Harry Potter who thinks he is an ordinary boy living with his Aunt,Uncle and Duddley. Then suddenly he gets a letter adressed to him and never gets to read it. His Aunt and Uncle are not telling Harry who he realy is.
By Marshall
 The story starts with a boy called Harry Potter who thinks he is an ordinary boy living with his Aunt,Uncle and Duddley. Then suddenly he gets a letter adressed to him and never gets to read it. His Aunt and Uncle are not telling Harry who he realy is.
Then he finds out about his parents and who he realy is A WIZARD. He is taken to Hogwarts School Of Wizardry with his new found friends Ron and Hermine. When Harry thinks that things could'nt get any better it gets worse when he mets Malfoy.
He starts playing Qudich and will find out that a teacher at Hogwarts is hiding a big secret
Thursday, October 14, 2010
The Iron Man,a synopsis by Renee
It starts with a rusted iron giant tumbling to the rocky,depths of the sea.
When he is discovered by a small boy he immediately thinks wrong of him.When people see the iron man they start to question, How did it get get here? Where did it come from?
and What is to be done with the marvelous iron beast?
The iron man is faced with a challenge that may end his life.Reckoned one of the greatest of modern fairy tales, this brilliant story written by Ted Hughes has caught many imaginations.
Will the iron man survive? or will this be his last battle?
The Butterfly Lion. Synopsis By Dean
Bertie rescues an orphaned white lion cub fron the afracain plains.
They are true friends where ever Bertie goes the lion cub goes to.
Until Bertie is sent to a school and the lion cub is sold to a circus in France.
They are true friends where ever Bertie goes the lion cub goes to.
Until Bertie is sent to a school and the lion cub is sold to a circus in France.
Bertie promises to find the lion one day and the never fogets the relationship bewtween Bertie and him.
.jpg)

.jpg&imgrefurl=http://kingsroad.learningspaces.net/node/1829&usg=__exv_5hr_eOQ6kJQ5q6gkua9dBQ4=&h=240&w=240&sz=15&hl=en&start=1&zoom=1&um=1&itbs=1&tbnid=WBnIGK-VRtV4QM:&tbnh=110&tbnw=110&prev=/images%3Fq%3Dthe%2Bbutterfly%2Blion%26um%3D1%26hl%3Den%26safe%3Dactive%26rls%3Dcom.microsoft:*:IE-SearchBox%26tbs%3Disch:1)
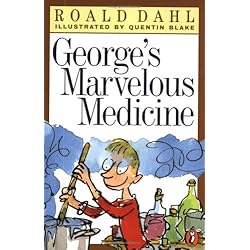
'George's Marvelous Medicine' - A Synopsis by Arlia
A taste of her own Medicine.
George is left alone with his mean nasty old Grandmother.
"Time for my medicine George"
George decides to make a new medicine.
Will it work?will she pop up like a balloon or will she explode like fireworks or will she turn red and fly to the sky?
 Whatever happends George and grandma are in for a fantastic surprize.
By Arlia
'The Iron Man' - A Synopsis by Alex
Ted Hughes
The story starts with a giant man made of iron who topples off a cliff off the coast of England.
A little boy called Hogarth comes and watches the monster put its self back together.
The plot describes the friendship between the two and shares their adventures.
One day another monster comes to earth, the iron mans mortal enimie.Will these to monsters clash together.Will this town be peacful ever again...and what will happen to the Iron Man?
READ TO FIND OUT IF YOU DARE.
'Charlie and Chocolate Factory' - A Synopsis by Amara
Mr. Willy Wonka has opened up his Chocolate Factory once again.
Only five lucky golden tickets to be won, Also one child will win a life time supply of Chocolate.
Who will win? Spoiled Little Brat-Veruca Salt, Fat Kid-Chocolate Lover Augustus Gloop, TV Freak Mike Teavee, Dim-witted Gum Chewer-Violet Bearegarde Or A Poor Little Boy-Charlie Bucket ?

Only five lucky golden tickets to be won, Also one child will win a life time supply of Chocolate.
Who will win? Spoiled Little Brat-Veruca Salt, Fat Kid-Chocolate Lover Augustus Gloop, TV Freak Mike Teavee, Dim-witted Gum Chewer-Violet Bearegarde Or A Poor Little Boy-Charlie Bucket ?
'Goerge's Marvelous Medicine' - A Synopsis by Abbey
George lives with his mum and dad-Mr and Mrs Kranky and his nasty grandmother.
George lives with his nasty Grandma whom he dislikes. George has had enough of the bell and doing everything for her.
So George wanted revenge on his Grandma. Time is getting shorter and it is almost medicine time. George has an idea.
Will George get revege on his Grandma. Read and find out for yourself.
George's Marvelous Medicine - A Synopsis by Rebecca
George hates his grotty old grandma, who dosen't move a inch all day.
His mum is out and his dad is at work so George has to do chores for his grandma like giving her medicine.
George has had enough and needs to get revenge and there is only one way to do it. Create a marvelous medicine.
Time is ticking and its almost medicine time.
But will it taste right.
George is eager for a bang , but will it happen?
With sugar and spice and everything not nice, it should blow her out the roof.
Read to find out what happens.
Lewis's Computer Art Instructions
First I took ten photos of nature, ten photos of objects around the school, ten photos of people and ten photos of anything I wanted. These photos were put on Paul's computer to show the other children and would be used later.
After completing my photo shoot I went on Paint on the computer design artistic shapes.
The next step was to do a five photo story with the five photo story we made a slide show out of five photos.
Next we went on Art Rage and when we went on Art Rage Paul said we could make anything we wanted.
I produced a sunset and a picture of space.
George's Marvelous Medicine - A Synopsis by Sanne
George lives with his mother, father- Mr.Kranky and his mean old grandmother.
Most days Gorge is left alone with his grandmother who bosses him around all the time.
George has to give her a medicine every day as well as other boring chores.
One day he gets fed up with her and her bossing around, so he comes up with his best plan yet;
he desides to make her a new medicine and waits for the results.
Extrodinary things happen to her and to other characters.
Will George ever get rid of his evil grandmother?
Olivia's instructions for printmaking!
To do printmaking there is a safety rule you'll need to follow or theres going to be a few messy parts.
Rule number 1: When you use the chisel make sure the hand that your not using to hold the blade is behind the blade otherwise you might cut yourself.
What you need!
.A paint roller!
.A pencil!
.Some paper x3!
.Any color crayon!
.Plasters just incase you hurt yourself with the blade!
.A veriety of patterns or drawings!
.A board so you can use to rest your wood on!
.A few chissels please keep out of reach from little children as they won't know how to use them!
.A chissel blade to screw into the chissel!
.A variety of colored inks either red ,black or blue!
.And last of all some soft wood to do your print on!
How to do print making!
.
Rule number 1: When you use the chisel make sure the hand that your not using to hold the blade is behind the blade otherwise you might cut yourself.
What you need!
.A paint roller!
.A pencil!
.Some paper x3!
.Any color crayon!
.Plasters just incase you hurt yourself with the blade!
.A veriety of patterns or drawings!
.A board so you can use to rest your wood on!
.A few chissels please keep out of reach from little children as they won't know how to use them!
.A chissel blade to screw into the chissel!
.A variety of colored inks either red ,black or blue!
.And last of all some soft wood to do your print on!
How to do print making!
- To get started come up with a design that you would like to cut out.
- If you like your design than you can draw it on a piece of paper as a draft.
- When you are finished with your draft than you can copy your design from paper to wood.
- Use a chissel to go through the pencil lines make sure your hand is behind the blade,if you cut yourself than clean out your cut with clean water than dry it and place a plaster over top of your cut.
- Before you put ink on your wood do a crayon rubbing by puting a piece of paper on top of your design and get a crayon and start shading on the piece of paper.
- If the lines are getting covered by the crayon than you will need to get your chissel and go through all the lines so if you do crayon rubbings the crayon won't go over the lines
- To finish of grab your roller,ink and paint shirt.
- Put your paint shirt on and pour your ink onto a piece of newspaper.
- Then choose the color that you want to do and paint over the wood.
- Next place a piece of paper on top of the wood and flaten it by using your hands.
- Carefully take the peice of paper of your wood and leave the piece of paper and the wood to dry.
- And repeat instructions as much as you like.
.
Jahna's Printmaking Instructions
WARNING!
Keep your hand behind the chisel!
Keep it deep
What you will need:
Ink any colour
Paper x2
Paint shirt
Plasters (just it case you hurt your self)
A pencil
Crayon
Roller x2
These are the steps to making a perfect woodcut
Step 1.Choose your theme e.g: Maori art or words
Step 2.Once you have thought of your theme grab your peace of paper and
draw your theme.
Step 3.When you are happy with your design draw it onto the peace of wood
Step 4.Grab the chisel and careful start curving out your lined pencil by moving your wrist side to side
(Remeber keep the free hand behind the chisel)
Step 5.When you have finished chiseling put your art shirt on.
Step 6. Put your first roller in your coloured ink and roll it onto the peace of wood with your design on it
Step 7.flatten your blank peace of paper onto your inked wood do this by using the
non ink roller also using your hands
Step 8.Careful peel off the paper
Step 9.Let them both dry then you choose what to do with them
Look at that 9 easy steps
Charlie and the Chocolate Factory - A synopsis by Ashleigh Watson
Mr Wonkas Factory is opening at last!,
but only five lucky children with five golden tickets are allowed to enter.Introducing a spoilt brat, an extrodanary fat boy, a dimwitted chewing gum eater with the fastest jaws around, a tv freak, and young Charlie.

Bad, scary and extrodanary things happen to those five children as they explore the factory with Mr Wonka.
Will Charlie ever get what hes always longed for?
Happiness?

Ashleigh's Printmaking Instructions
* Firstly come up with some saftey ideas and talk about some different ways to use the chisel.
* Look at some different designs (Maori patterns) that you want to use and start practicing them on newsprint.
* Practice using the chisel on the other side of your woodcut design so you get the hang of it.
* Choose your blade that you want to use, they are V,C or U shape.
* Cut out your design on your board , you can do this by wriggling your wrist as you push. Remember to keep your hand behind the blade and use your other hand to keep the board still.
* Complete a crayon rubbing onto a piece of paper, if you are not happy with your design, think of ways to improve it and clean out ant cuts which are not deep enough.
* When you are happy with your design start to put some ink on your roller. You may select any colour, but dark colours are best.
* Now roll the ink onto your woodcut evenly.
* Get a piece of cartridge paper the size of the woodcut and place carefully over it and press firmly with a clean roller and fingers.
* Peel off carefully to reveal the wonderful print you have created.
* Repeat as many times as you want to make more prints.
Print Making
Rules You Must Follow ARE:
Keep Your Hand BEHIND The Blade
Wiggle the blade don't push
Don't start cutting until you have done your design
Step 1 To Begin you have to draw your pattern on paper with some ideas from the board
Step 2 Once you have finished drawing you transfer it onto wood
Step 3 Then cut the pattern on with the blade provided
Step 4 Smooth the pattern
Step 5 Use roller with ink colour of your choice
Step 6 Put A4 sheet of paper over it and use dry roller
Step 7 Peel off paper and leave to dry 12-24 hours at room temp and your done
Wednesday, October 13, 2010
Instructions for Printmaking
Firstly think of a theme or design you have seen or create your own, making sure its not too detailed otherwise you might not be able to cut it out.
Set up your equipment and place your base on your working area to protect your desk or table.
Put your board on top of the base and draw your design in pencilon the board, after you have completed some practice drawings.
Use your chisel to cut out your design, face the chisel away from yourself so you do not injure youself, use a wriggle action with your wrist as you cut.
When you've finished cutting out your design complete a crayon rubbing to check the cuts are made cleanly, then use a roller to apply ink evenly on the board.
Straight after you have inked the board, place paper carefully over the ink,roll and press firmly with your fingers.
You have created your own design, you can use and re-use this and even try different colours for different effects.
Written by Renee.
Subscribe to:
Comments (Atom)